Prototyping Gameplay Mechanics (Weeks 2 - 5)
I began prototyping the gameplay mechanics for my endless runner game, Western Runner.
Published on September 15, 2019 by Amy Elliott
Unreal Engine Blueprints Dev Blog College
30 min READ
Please note: This game was made when I was learning Unreal Engine and GIT for the first time. The content within this blog post is not representative of my current skills.
Testing Code/Level Testing
Run Forward
This is my Blueprint for my run forward function, it makes the player run forward without any input, and this is what all endless runners have, I stuck to my plan which I had before, and added an Event Tick to my movement input, this means that the player would move forward without any input.
An Event Tick is when an event called every frame, if ticking is enabled, so this means the player would move on the forward vector every frame.
I didn’t have this enables for the left/right movement since I need the player to move left and right when they need to instead of automatically, since, that would mean there is no game at all! (Since you need to avoid the obstacles)
Jump Pad
This is my Jump Pad function, I would use this in the game so the player can proceed, places which I think would be useful for this to be used would be at the links between different train carriages and to collect collectibles in the air.
So that means they would have to be randomly generated, but within certain conditions, so, they get randomly generated, but they have to have a few coins above it, or it has to detect whether is it at the end of the train carriage, so if it’s at the end, have a jump pad without coins so you can jump across to the other carriage, and if it’s not at the end, have a few coins above it so the player can collect those.
How does the jump pad work?
Well, I started by making a new BP class (Actor) and then on that, in the view port, I added a new Cylinder component (Or it can be whatever mesh you want it to be) and resize it to my desired size, and in my collision presets I changed it so it had No Collision, this is because I want the player to collide with the box collider which we are soon going to be inserting on the cylinder since I would personally prefer the player interact with the jump pad before they actually walk over it, since from their point of view they would be confused as to why they weren’t jumping as the camera is in orthographic mode, so the jump pad would look as if it appears and the player runs over it sooner, so, with the cylinder selected, I added a box collider component and resizing it to my desired size. On my box collider details, in the collision settings, I have to make sure that Generate Overlap Events is on, what this is it checks if that is turned on, and then it can do Overlap Events, if it’s false, then when the player overlaps with the collider, it wouldn’t do anything. I then set the collision preset to Trigger - And this basically means, that when the player collides with the collision box, an event will trigger.
And the event is the Blueprint below, which is how the Jump pad works.
At the start, we have an Event Actor Begin Overlap, which is connected to a branch, which is basically a Bool condition, it checks if the condition is == (Equals to with double equals) the Get Player Pawn, and this Get Player Pawn is connected to Cast To Character, which essentially calls the player character object.
If the branch is true, the As Character is Launched with the Launch Character node, and the character is connected to the target of this, then we set the Z axis to how high we want the player character to go. We Override the Z axis so that the velocity of the player doesn’t keep increasing, for example, if they player were to keep bouncing on it they would get higher and higher and we don’t want that, we want them to jump the same amount each time, but they wouldn’t get an opportunity to do that anyway since they would keep on going forward.
Collectibles
This is my collectibles function, it is used throughout the level for the player to collect negative buffs or coins.
How the collectibles would work in my game is they would randomly be placed throughout the floor tiles for the player to collect, they would collect these and avoid the obstacles to collect them, sometimes these collectibles could be next to a jump pad so they collect them in the air.
There is going to be 3 different types of collectibles at the moment, a beer bottle, which is a debuff, it would make the screen fuzzy, and hard to see, this debuff is similar to how the squid debuff works in the Mario Kart games
Mario Kart Wii (2008) Nintendo
_
It would be a distraction to the screen for the player, so the player has trouble navigating, they have to trust their senses, and hope they don’t bump into anything, these bottles would be something the player would try hard to avoid.
And then you have the Gold Coin collectibles and the Gold Brick/Bag of Gold, these would be collected and added to a separate score from the main score, this would total up and be the amount of gold which the player has collected, and using this they can purchase items which can boost their performance for a certain amount of time, upgrade things or change the appearance of other things.
I made the collectibles by having a main collectible function, since depending on what object it is you’re collecting, there is a different output.
How the collectible FUNCTION works, is I began by making a Blueprint Actor and adding a Cube component, this will be changed to whatever mesh it is later on, but it’s just a cube at the moment to test it’s functionality.
I set the collision of the cube to no collision in the collision presets, otherwise the player would get stuck, and then I added another component, a cube collision, and this, in the collision presets is set to Trigger, and like the jump pad, we have to make sure the Generate Overlap Event is enabled.
And then we come to the Blueprint.
What happens here is, starting at Event Actor Begin Overlap, we need to use it since it is triggered on overlap, and then, the same as the jump pad, we have it connected to a branch which checks if the the player is collided with it, and if it is true, the string would be printed that the player has collected the coin, after this I would destroy the object, but that isn’t in the blueprint picture.
The event tick is to do with how the collectible moves, so using the Event Tick (Every frame) and add it to an Add Actor Local Rotation adds a delta to the rotation of this component in its local reference frame which, if we set the Z axis, would rotate the collectible around, just like what happens in games with collectibles, and then this is attached to a timeline which, on the timeline is connected to a vector track which is locked in the Y and X axis, and then made to move on the Z axis up and down, and then I enabled loop and cut it down to the right time, and then the update of the Timeline is added to the Add Actor Local Offset node, which adds a delta to the location of this component in its local reference frame.
Floor Tiles
These are the floor tiles which the player would be running along in the game, the mesh for the floor will be replaced with train carriages later on, but since I am just testing functionality at the moment, I used a simple cube to check it all worked.
I began by making a Actor Blueprint, and adding a cube to it, which I will later change to a mesh, I then moved it 500 units along the X axis.
To give the floors a direction to spawn in, and a point I added the Arrow component to the Blueprint, I then moved it 1000 units along the X axis so it was perfectly inline with the floor tile.
On the function of my blueprints, I made a function which is for getting the point which the floor tiles are going to attach to, and it would attach from the new point, making it so the floor tiles would attach from the end of each other and not all in the same place. The return value of the Get World Transform of the attach point on the floor tile would update each time.
After this, I made a new function called Add Floor Tile, and what this does is it adds the new floor tile after the player had ran through the floor tile, firstly I added a Spawn Actor, and the actor I wanted to spawn was the Floor Tile, so it was Spawn Actor Floor Tile BP.
Then, I wanted it to spawn on my next spawn point, so I promoted Spawn Transform to a variable and named that variable the Next Spawn Point.
Here, when the game begins playing, the for loop adds 10 floor tiles, so then when the player is playing the game they don’t see a gap in front of them when they’re running, because there is plenty of floor tiles already spawned ahead of them.
And then, on the end of the floor tile I have a box collider called my End Trigger, and the collision on it is set to Overlap Only Pawn, which means it would only trigger if the Pawn overlaps it.
On here we are adding events which what happens when the player runs over the end trigger, from here, we call functions like Add floor tile to the top, and then we add a delay and then destroy the floor tile of the end trigger that we ran over.
I had trouble getting this to work due to always getting infinite loop errors, but in the end I got it to work, and it was just some small mistakes.
To solve the error I added a few break points to find out why the error was happening, the breakpoints I added were in the blueprint which the error was bringing me to, I kept checking it over and over, and nothing seemed out of place, so I had a look at my other blueprints.
In the end it was nothing to do with that blueprint, it was fine, all that happened was I forgot to connect a node!
Now it was working. But I was facing another problem.
For some reason, the tiles spawned fine, but they kept resizing by 10 every time.
Since it was doing what I needed to, and it was to do with it resizing, I went back into the viewport and I looked around, at the end, I realized it was to do about the scale of the attach point.
When I scaled up the floor tile, I had the attach point as a child of the floor, so it resized with the floor and made the errors of the floor resizing every time and inverting itself since the Z value was so small on the attach point, so I set these back to the values which they should be, and everything worked in the end.
Sample Models/Testing Assets
I thought, since my game is based on the Western theme, and western is rather old-fashioned, my game could have low saturation, and look like an old film clip, sort of like how Cuphead made the game look like an old cartoon since that’s what it was based on.
Cuphead (2017) Studio MDHR, Studio MDHR Entertainment Inc.
I still feel like a lot more could be done with the filters to make this look more old-western style, but this is just messing around with colour grading, grain and saturation in the Post-Processing Volume.
I imported the Tiny Cowboy asset into my game to test how it would look and work, and to get the running working correctly (Since the Tiny Cowboy skeleton and the default Unreal Engine skeleton are different) I used Mixamo - a web-based service for 3D character animation, which use machine learning methods to automate the steps of the character animation process, including 3D modeling to rigging and 3D animation. I find this very useful since I’m not good with rigging or animation. Mixamo is free for commercial use, to get it working, all I did was download the FBX file for the Tiny Cowboy, and add it onto Mixamo, and then, once that is done, all you need to do is pick an animation, and it would work.
To get everything working, I had to select the third person character from the World Outliner and change the Skeletal Mesh and Animation, otherwise, it would’ve used the default animation and it would’ve all been messed up.
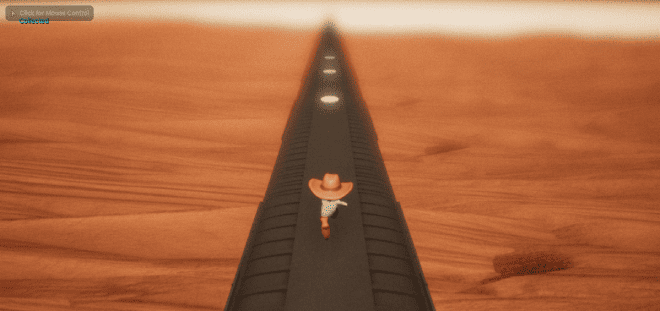
After that, and some adjustments to the scaling and collision, I had finally got the main character model in the game and working.
But, then I realized the Camera on Orthographic mode really didn’t look nice, so I changed it to perspective and it ended up looking a lot better in the end in perspective view.
Perspective
Orthographic
After doing this, I decided that I should get the floor tiles to spawn train carriages instead of a blank floor, so I began by looking through the different assets that I picked out, and trying out a few of them.
I ended up really liking the first choice of mine, I picked the Box Car asset, and it worked out really nicely in my game.

To make it so the player doesn’t walk off of the side, I added bounds to the side of the train walls, this is good because, firstly, the objectives would only spawn on the train, and if the player falls off and can’t get back on, they can basically avoid all of the obstacles, and get a really high score. Secondly, they wouldn’t be running over the end trigger if they’re in a dead spot of the train without colldiers, so they would be running but not spawning the next train carriage, meaning they will get to the end and fall off since the next event wouldn’t have been triggered.
Next, I’m working on the background and putting in a background, I didn’t want the background looking too realistic since this game is a low poly game but I didn’t want the background just being a flat plane, so I was experimenting with these backgrounds which I found on the Unreal Engine asset store.
Landscape Backgrounds (2016) by Gokhan Karadayi.
I knew when I inserted them, they were far too realistic to be put in my low poly game, but I really liked how they looked, so I played around with the material to see if I can achieve a softer, more cartoon look with the sand landscape.
The next time I opened up Unreal Engine, I had lost some of my data, something went wrong, I did get a pop up window about reverting the files, but I clicked no for some reason.
I figured out that the easiest way to fix this is to revert to my last commit on my Git repository, this is where I’m glad to know about how to use Git.
Using Git, I reverted back to one of my older builds, so I can continue from there, reverting back.
I done this on my home computer, since my home computer has TurtoiseGit, which is a Git GUI which I am more familiar with in comparison to GitHub Desktop.
This is the commit which I wanted to revert back to, the other commits were faulty and messed up from me accidentally deleting too many assets, the commit highlighted is where everything all worked how it should do, so I began trying to revert on the GitLab website by clicking on the commit, and the 3 dots and pressing the revert button, this worked for the latest commit, but when I tried reverting the ‘Bad Commit’ it came up with this error - That is because the ‘Bad Commit’ and ‘?’ commit are pretty much the same, except a few files which aren’t important, so I decided this plan wouldn’t work so well, so I tried reverting using TurtoiseGit.
So, I opened the log and found the commit which I wanted to revert to, and I right clicked and checkout to that commit, and I unticked create new branch, since I wanted this to checkout in the master branch. Doing this brought up another error.
To get everything working, I had to revert some files since I didn’t want them.
The four MyProject files in the paths Versioned Files were the files which I needed to revert, so I shift clicked all of them and right clicked and pressed Revert, and of course, this came up with another error. So I decided I need to try something else.
I right clicked my Unreal Engine file in my file manager and pressed Revert, and the same error popped up again.
So, I decided that maybe it would work if I deleted the file which is giving me errors (MyProject.442/Saved/Logs/MyProject.log) and then, I went back to checkout the commit which I wanted to go back to in the log, and I make sure that I have create new branch unticked.
And it worked, my project was back to the commit which I wanted it at, and it was all working like it did before!
But I wasn’t done yet, so I copied the whole project file, and pasted it in another route, the reason is, I’m still exploring an out of date version, I won’t be able to add new commits until I jump back up to date.
After I had copied it, I went back the the original file and went to the logs and checkout master again, so I was up to date, and then I pulled the original file for my project, to set it back to date.
After I’ve done that, I got my copied files and put them in the project folder all the files except .gitignore, replacing the old ones with the ones which work, and then I done a new commit. - And now it all works and it’s up to date with an older commit!
Back to the desert background, I used the realistic background and it turned out to be far too realistic for my low poly game.
But I tried it out anyway, I got the background, resized it, and turned off the collision, putting it just below the train on the floor tile, so the background would loop along with the train spawning.
Viewport
In the Game
I knew the desert looked too much for a low poly game, so I decided, to make it look like it would fit in I would have to go into the material editor and edit the material of the sand to look less realistic, but I liked the bumps and all the detail so I wanted to keep some of that in the game.
In here I was working with the materials on the sand, trying to make it look cartoony, I started with the normal map, changing the saturation of it so it would look slightly less detailed.
This is an image showing what the sand looked like before and after changing the normal, but I still feel like it needed more work, deserts which are in games which are child-friendly tend to look a lot more brighter.
Mario Kart DS (2005) Nintendo
Now I was working with the actual Base Texture of the sand, to make it a lighter colour, I increased the brightness and I changed the hue so the sand was more red, so it looked more like a deep desert, and doing this really helped make my game look more cartoony
It looks very bright on the base colour, but once it was applied, I personally really like how it looks, and how it’s the same sort of colour as our players hat.
Overall, I’m really happy with how the sand has turned out, and I think I’m going to keep it this colour since it really brightens the game.
It looks really gloomy and too realistic in the first picture, and it looks bright and much more appeasing to a younger audience in the after.
I decided that I should probably try and get the model for the collectibles in, I was originally going to use the Coin model which I have above, but I realized it was a .rar file, and we don’t have any way of extracting a .rar file on the college computers, so I tried the beer bottle and the bag of gold, on both of those, the materials weren’t loading, so I decided to look for another coin to use as a place holder for now, or perhaps I would like it enough to actually use it for the game, I found this Low Poly Gold Coin by Blob Fortress (2018)
It looked very simple, but it’s perfect for what I need, and it looks great in the game, the only downside is it is a very dull colour, but that’s easy to change.
The coin didn’t have any metallic or specular on it either, so I added some on myself, and adjusted the vibrance and saturation of the coins colour so it stood out more, but it still didn’t stand out enough.
So, I messed around with different settings in the material editor and I finally found what I liked, and it’s the 3rd one across in the picture to the left. I like this because it looks the most realistic out of all the three, it’s not too dark or too light and it reflects the world around it, like a normal shiny coin would do.
Now I’m working on getting the player to run in 3 different lanes on the train tracks, since most endless runner games have different paths which you can snap to. I used this Youtube Tutorial to help me.
So I made arrow components on the floor tile which is where the player can move between.
After doing that, I headed into the blueprints of my Player Character, I added a left and right input key on the blueprint.
After that I made a variable named lane, and I set the variable type to Integer, and I set the default value to 1, and then I made another variable called NewLane, keeping it an integer, keeping the default value as 0, but it doesn’t matter what this is, since the value would be changed and overridden.
And then I made a new variable, called Lane Y, since we are moving it on the Y axis, changing this to a Float, and then I changed this float to an array, by clicking on the side of where you select what type it is. And then I pressed the + value on the array to make 3 Values, and then I set the values to what locations I have the arrows at on the Y axis in Unreal engine, so that is 150, 0 and -150. I then attached the left key, so when the player is clicking down on the left key we want to Set the New Lane, and then drag out from new lane and Clamp it, the clamp will stop it going past 2, we set the minimum to 0 and the max to 2, and then we drag out from value and attach it to an Integer + Integer node, then we hook the Lane variable into the original value of the node, and then add 1 to the next value of the node, since we are shifting to the left. And then we copy and paste all of that and attach it to the right key pressed, and then changed the value of the node to -1.
This is pretty much setting up the functionality of what lane we are going into, now we have to make the player character move into those lanes.
I’m are going to use a lerp, so the player Linerarly Interpolates to their location instead of snapping to it, using a lerp will make the game look a lot smoother.
I added a Timeline and named it Lerp, since that’s what it’s going to do, I then attached both the white arrows from both Set nodes into the Play from start pin in the timeline.
I headed into the timeline and made it a float which had a lifetime of 0.1, so that’s how long the lerp is going to last, we don’t want it too long, or else we are going to take forever to get to the next point, but we don’t want it to be too much faster or else it will look like we are snapping to the next point.
Then I drag out from Finished and I set Lane, and then drag out a reference to new lane and attach it to the lane pin.
And then I drag out from the update on the timeline and add the node SetActorLocation, this would set the character location to the current lane and Lerp it there.
In the location pin of the SetActorLocation, I split the pin.
And then I dragged out a reference to the Capsule Component and get world location from the capsule component and then I split those pins and attached the Return Value X and Z to the new location X and Z.
And then I added a float Lerp and hooked up the return value into the Y pin, and then on the lerp float I attached the alpha into the Lane Y on the Lerp Timeline, and then I dragged out the Set Lane Y array and dragged out from that array and attached a Get node, and hooked that up to the A pin on the Lerp, and then I got another reference of the Get node and hooked it up to the Lerp B pin.
After that I got a reference to the Lane variable and attached it to the first Get node which is attached to the A pin, and then I got a reference to a new lane and attached it to the other Get node, and then I also hooked up the other Get to the Lane Y array variable.
And this is my result
And now I’m working on getting a collidable blocker into my game, I began by finding something which the player would collide with, I began with trying the branches that I had above, but then I thought, that I can’t have them floating mid air, so I searched for a tree mesh to use, and I found one which I’ve looked at beforehand.
Low Poly Tree (2011) stanloshka.
So I inserted this into my Unreal Project and gave it a material.
And then I made a blueprint called BP_Blocker, and I added the tree in as a static mesh and sized it up how I wanted it to be.
I then added a function into my Floor Tile blueprint called Spawn Obstacles, this function would spawn the obstacles (Obviously)
I began this blueprint by attaching the white pin to Switch on Int, and attached the selection to a Random Integer in Range, the minimum value of 0 and the Maximum value to 1, this means that the obstacle can either spawn or not.
I added a pin to the Switch on Int so I have 0 and 1, 1 being spawning and 0 being doing nothing, I left the 0 pin blank and attached the 1 pin to SpawnActor, and I selected the class BP_Blocker in the class section of the node, this would spawn the obstacle which is in the BP_Blocker, in this case it’s the tree.
And then I attached my Spawn Transform to GetWorldTransform node, attaching the return value to the spawn transform, and then just to test, I dragged the Middle arrow component into the target of Get World Transform.
I quickly found out that having a tree as an obstacle looks really odd and not right.
At the beginning of the GIF you can see an issue with the camera, the reason why that is happening is because of the colliders, to make the camera work properly again, I just switched the collider presets to a custom collider and set it to these settings.
If I were to use any other collision presets I could come along the issue of the obstacle not spawning or the player going through the obstacle.
I knew I now needed to think of another obstacle which would be on top of a train, there isn’t much, nothing would really make sense, so I decided perhaps wooden crates and pipes would be a good idea.
So I found a nice Pipe Rail 3D Model (2019) by CallumFTW
To make the obstacle spawn in multiple lanes instead of just one, I duplicated the blueprints and attached them to the other 2 lanes.
Next, I used the same script to add a bridge which randomly spawns in the map which you can go through, I made the bridge spawn in the middle and sized it up, duplicating the bridge and adding multiple bridges side by side.
I pretty much duplicated the blueprint and changed the class to BP_Bridge (The blueprint with my bridges in) I turned off the collision since the player wont come in any contact with the bridge at all.
I can also use this blueprint to add randomly generated scenery with cactus’s and trees and anything else that would be in the background of a desert.