Development Blog (Week 6)
I have been carrying on my work on the user interface for the game, making menus functional, as well as a proper gameplay loop with UI.
Published on January 06, 2020 by Amy Elliott
C# Programming Unity User Interface Dev Blog College
16 min READ
Please note: The code and content within this blog post is not representative of my current skills.
Week Number & Date: Week 6 - 06/01/20
List of Tasks planned for this week:
This week I plan on making functional UI for my game, the UI won’t be polished since I will leave that until the last few weeks of production.
I plan to get all the UI in my game working and make the game actually feel like a game.
Current Position -
What did I do this week and why did I do it?
Unity - UI
Unity - UI: Main Menu
This is the UI I plan to put in my game today, it may not be polished UI but I plan to make it as functional as I can.
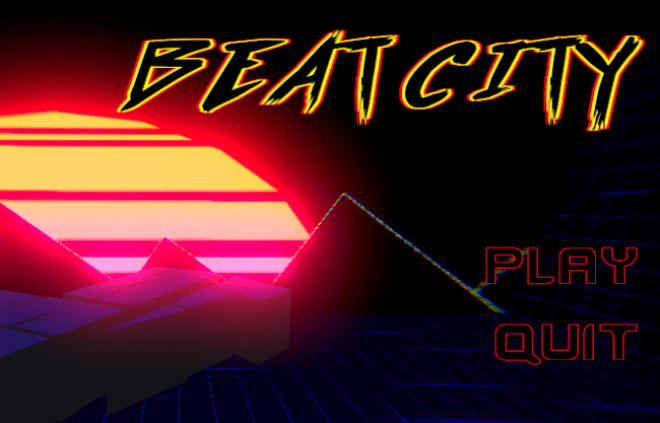
I started off by making the main menu, it doesn’t look like anything special at the moment, but it works.
This is the finished menu screen, it’s not polished, it’s just functional.
To make this, I began by duplicating my main scene, just so I can use the scene of the game for the menu.
I deleted the player character and the cinemachine camera on the new scene, and everything unnecessary, I then set up the camera how I wanted and added in the title and the play and quit buttons.
After this I made a script which I called UI_Menu, which simply included public voids of the QuitGame and PlayGame which I can use in the OnClick function on the buttons.
using System.Collections;
using System.Collections.Generic;
using UnityEngine;
using UnityEngine.SceneManagement;

public class UI_Menu : MonoBehaviour
{
    public void PlayGame()
    {
        SceneManager.LoadScene(SceneManager.GetActiveScene().buildIndex + 1);
    }

    public void QuitGame()
    {
        Application.Quit();
    }
}
This simply either starts the next scene which is buildIndex 1. The menu is buildIndex 0, the next scene is the game.
If the player clicks Quit. the game quits.
Unity - UI: Main Game
For the main game, I began by making the mission accomplished UI, which just came into my head out of nowhere, which gave me the idea to have random missions in the game for each new game.
I made this Mission Accomplished UI
This UI still needs polishing since I’m simply testing out animations and functionality at the moment, and this GIF doesn’t properly display the UI since it is a lower framerate.
To go along with this I have a UI for the players money.
These aren’t functional yet, and they’re not polished at all, but it’s a rough idea of what I want to have in the game.
I then began to make a Song List UI.
I began making the checklists for the missions, this was very simple to make.
At first I was going to have the checklist go vertically down on the left hand side, but I didn’t like the look of that, so I made it go horizontally along the bottom, and I thought this looked a lot nicer to the player, and it’s easy for the player to look at the checklist whilst playing since it’s at the bottom of the screen.
This is the checklist I made, I made an empty game object and named it Missions, and in that checklist I made a panel with a Horizontal layout group in it, I then inserted a checklist UI and named a few random missions, making the checklist a prefab so it can be referenced and instantiated, much like the song list, the values of the checklist will change as well.
To make the checklist look nicer, I changed it from being a checklist to being some text with a separator next to it, I done this since I feel like it looks a lot neater.
And now there is also, on the left hand side, some UI which tracks what you’ve done in the game so you know how close you are to completing your next mission.
Unity - Mission Functionality
I wanted to make my missions functional this week, by making a list of missions and making it so once a mission is done, a next mission would display, until all missions are complete.
I started this by getting the checklists to function properly.
using System.Collections;
using System.Collections.Generic;
using UnityEngine;

[System.Serializable]
public class QuestingSystem
{
    public bool isActive;
    public string questDescription;
    public int goldReward;

    public GameObject checklist;
}
I began this by adding a script to my Mission empty object of my UI.
This script was going to be a Serializable field for adding all of the values which I’m going to have in a mission.
The reason why I’m making it serializable is so I can make multiple instances of that object and not have to have loads of copies of different things. It also didn’t have to derive from Monobehaviour since it is it’s own class.
After that I made another script applied to my Mission empty object called QuestList
using System.Collections;
using System.Collections.Generic;
using UnityEngine;
using UnityEngine.UI;

[System.Serializable]
public class QuestList : MonoBehaviour
{
    // We have to be using UnityEngine.UI since our script contains UI tampering
    public GameObject checkListPrefab;
    public RectTransform panelParent;
    public int currentQuestNumber = 0;

    // This script has to be a scriptable object which derives from MonoBehaviour so we can edit values in the inspector
    public List<QuestingSystem> fullQuestList = new List<QuestingSystem>();
    public List<QuestingSystem> activeQuests = new List<QuestingSystem>();

    private void Awakeeeee() // Renamed for testing purposes to avoid running this function
    {
        // This section was just for test purposes; the Awake function was renamed so it wouldn’t run
        foreach (var questMetadata in fullQuestList)
        {
            GameObject newChecklist = Instantiate(checkListPrefab, panelParent);
            newChecklist.GetComponentInChildren<Text>().text = questMetadata.questDescription;
        }
    }

    public void Update()
    {
        // This bool and if statement checks if the player has reached the end of the quests.
        // It also checks if the active quests list doesn’t have more than 4 in it.
        bool reachedEndOfList = currentQuestNumber >= fullQuestList.Count;
        if (activeQuests.Count < 4 && !reachedEndOfList)
        {
            // In this if statement, it is running through what the current quest number is and adding it to the active quests list.
            // It then spawns the UI and increments the value of the current quest number.
            activeQuests.Add(fullQuestList[currentQuestNumber]);
            SpawnQuestUI(fullQuestList[currentQuestNumber]);
            currentQuestNumber++;
        }

        // This checks if the object isn’t active and then removes it.
        for (int i = activeQuests.Count - 1; i >= 0; i--)
        {
            var currentQuest = activeQuests[i];
            if (!currentQuest.isActive)
            {
                activeQuests.RemoveAt(i);
                Destroy(currentQuest.checklist);
                currentQuest.checklist = null;
            }
        }
    }

    private void SpawnQuestUI(QuestingSystem questMetadata)
    {
        // This is a function which I call throughout the code which I called questMetadata, just so I can reference the data inside the QuestingSystem.
        GameObject newChecklist = Instantiate(checkListPrefab, panelParent);
        newChecklist.GetComponentInChildren<Text>().text = questMetadata.questDescription;

        // This instantiates the checklist prefab and sets the values of the isActive bool to true.
        // Then it makes a new checklist from it, so I can access those values.
        questMetadata.isActive = true;
        questMetadata.checklist = newChecklist;
    }
}
This made the checklist work, and spawn, and then replace a completed quest when one is completed.
To get this to actually be functional, I made a few basic missions work.
And to make everything more neat, I made the QuestingSystem script a scriptable object, so I can create assets for each quest and add them into my quest list.
Using scriptable objects make things so much easier since I can access the QuestingSystem and make separate assets for it instead of having to type each one in the Missions inspector.
It also makes things so much easier to reference.
After that I began working on the quests Five Thousand Points and Ten Thousand Points, I made these work by going into my _Points script, which manage all the points the player gets and adding this:
// Missions
public GameObject missions;
public QuestingSystem fiveThousandPointsQuest;
public QuestingSystem tenThousandPointsQuest;
if (score >= 5000f && fiveThousandPointsQuest.isComplete == true)
{
missions.GetComponent<QuestList>().QuestRun(fiveThousandPointsQuest);
}
if (score >= 10000f && tenThousandPointsQuest.isComplete == true)
{
missions.GetComponent<QuestList>().QuestRun(tenThousandPointsQuest);
}I added a public GameObject called missions so that I can use the components of my QuestList, I then made two QuestingSystem variables named after the quests.
Once I made those, I assigned them in the inspector and then, in the same Points script I ran an if statement which checks the score and if the score is more than or equal to (Whatever score required for quest) AND the quest is not completed and set to true, it runs the function inside the missions Quest list which is called QuestRun.
public void QuestRun(QuestingSystem questToComplete)
{
    questToComplete.isNotComplete = false;
    SpawnMissionAccomplishedUI(questToComplete);
    Time.timeScale = 0.5f;
}
During writing this script, I was being lazy, and I wrote separate functions for each quest which was complete, like this.
public void QuestRun_fiveThousandPointsQuest()
{
    fiveThousandPointsQuest.isComplete = false;
    SpawnMissionAccomplishedUI(fullQuestList[currentQuestNumber]);
    Time.timeScale = 0.5f;
}

public void QuestRun_tenThousandPointsQuest()
{
    tenThousandPointsQuest.isComplete = false;
    SpawnMissionAccomplishedUI(fullQuestList[currentQuestNumber]);
    Time.timeScale = 0.5f;
}
But I did see how inefficient that was and made eveything into one singular function which I called QuestRun.
I also managed to get the Mission Accomplished UI to spawn once the mission was complete.
This is the function which I use to spawn the UI:
void SpawnMissionAccomplishedUI(QuestingSystem questMetadata)
{
    GameObject newMissionAccomplished = Instantiate(missionAccomplished_UI, missionParent);
    newMissionAccomplished.GetComponentInChildren<Text>().text = questMetadata.goldReward.ToString();
}
This instantiated the UI and it plays its entry animation, which is the panel sliding in, I also made a separate sliding out animation which was the same as the sliding in but backward, it then also sets the text to the gold reward which the player is going to achieve when completing missions.
To get the exit animation working, I made a script on the UI itself which I called UI_AnimationMissionAccomplished, and inside this script I wrote this:
using System.Collections;
using System.Collections.Generic;
using UnityEngine;

public class UI_AnimationMissionAccomplished : MonoBehaviour
{
    public GameObject button;
    public Animator anim_UI;

    public void exitAnim()
    {
        anim_UI.SetTrigger("isRead");
        Time.timeScale = 1;
    }
}
I had to assign an Animator to the UI and attach the animation, I also had to make the exit and then set a trigger which would trigger the exit animation when its set.
Unity - Display Music List
I had Ash’s help to make the music list work. I began by making this script:
using System.Collections;
using System.Collections.Generic;
using UnityEngine;
using System.IO;
using UnityEngine.UI;

public class MusicSelect : MonoBehaviour
{
    // I had to make sure I was using System.IO, since I had to access user files on the system.
    // I also had to make sure I was using UnityEngine.UI since I would be changing UI text.

    private List<string> musicList;

    // Begin by making a list of strings, which are what we use to put on the buttons when the player has to select the music.
    // We also use it to count how many songs we have to instantiate the right amount of buttons.
    public GameObject buttonPrefab;
    public RectTransform parentPrefab;

    // I make a game object which is the button prefab, which is what would be instantiated with the title of the song in it.
    // I also make a public rect transform for the area where I want the buttons to spawn in.

    private void Awake()
    {
        // This checks the music in the directory and adds it to the list of strings.
        musicList = new List<string>(Directory.GetFiles("Resources/Music", "*.mp3"));

        if (musicList.Count > 0)
        {
            // This checks if there is any music in the folder. If there is, it runs the foreach loop, which instantiates the buttons,
            // sets them as the child of the parent, and then sets the text on it.
            foreach (string song in musicList)
            {
                GameObject newButton = Instantiate(buttonPrefab, parentPrefab);
                newButton.GetComponentInChildren<Text>().text = song;
            }
        }
        else
        {
            // This is what runs when there is no music in the folder. I plan to update this later on.
            print("No Music");
        }
    }
}
This script is then attached onto the panel which is inside the Music Select UI, this panel controls the layout of the buttons and how they’re going to populate.
I then made a button and made it look nice, I then dragged this button into my Prefabs folder, making this a prefab so I can reference it and then instantiate it when needed, this means that every button which spawns would neatly horizontally populate the panel, and not all be ontop of each other.
What did I find difficult or easy?
This week, I found the animation quite hard to get working, since I don’t know fully how to use it yet, but I’m learning.
I also found displaying the music list a tricky task since I was using functions which I haven’t even used before, but it’s all part of learning
What tasks didn’t I complete from this week?
I didn’t get the death screen done on the Unity - UI task.
Planning for next week -
- How do I plan to catch up? Do I need to change anything about my work or planning?
I plan to catch up by getting my death screen done and working on getting my song selection to function in the game.